4 Tips When Creating a Mood Board

Uncovering your client’s personal style and creating a mood board is all about considering the story that they want a space to tell about themselves, their family and their life.
The process of creating a mood board, and the feedback that you receive when you present it to your client will lay the foundations for your entire project. But what is a mood board? Let’s start with styles and moods.
What is a Style?
A style is the name for a trend that has been recorded as living long enough or having been embraced by a significant number of people.
Therefore what begins as a trend, if successful and if universally acknowledged, will become an established style.
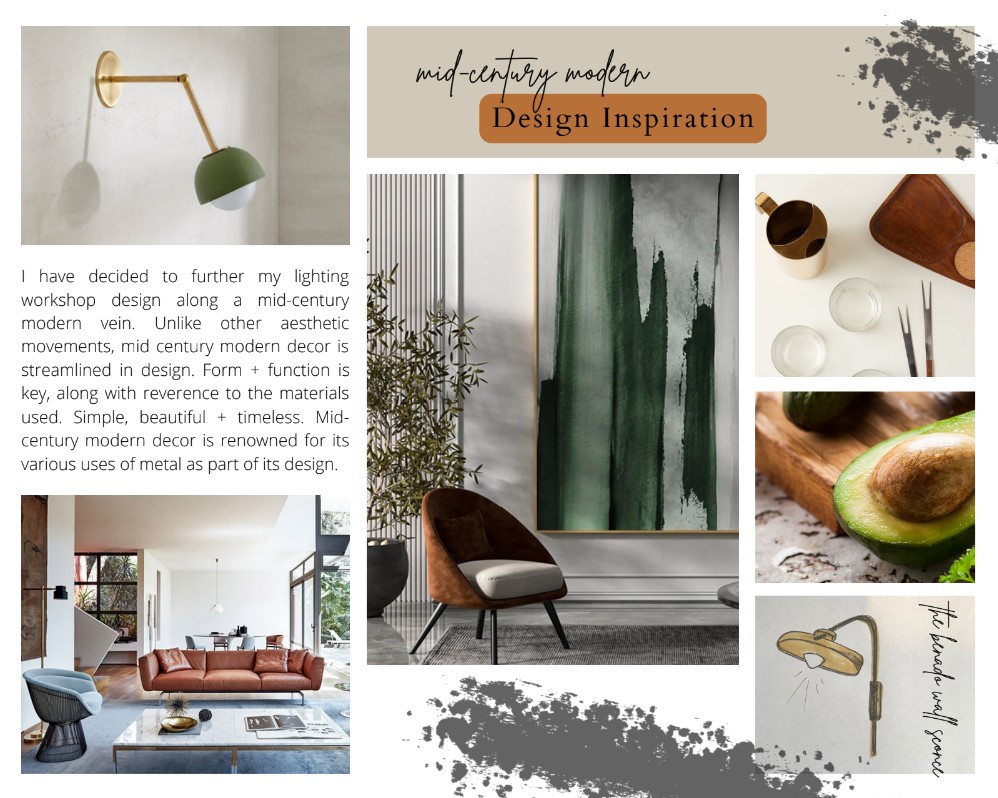
ISCD student Melissa Killen draws inspiration from the mid-century modern style for an original design.
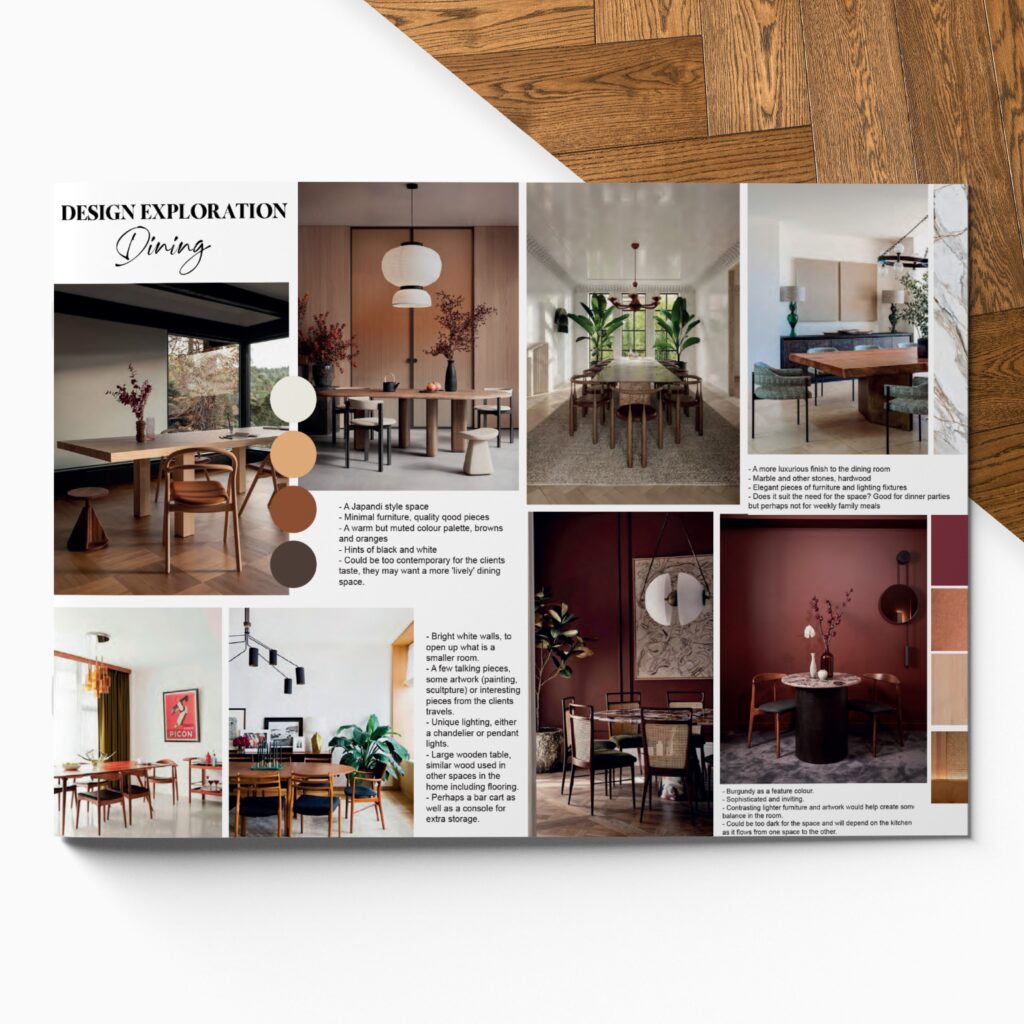
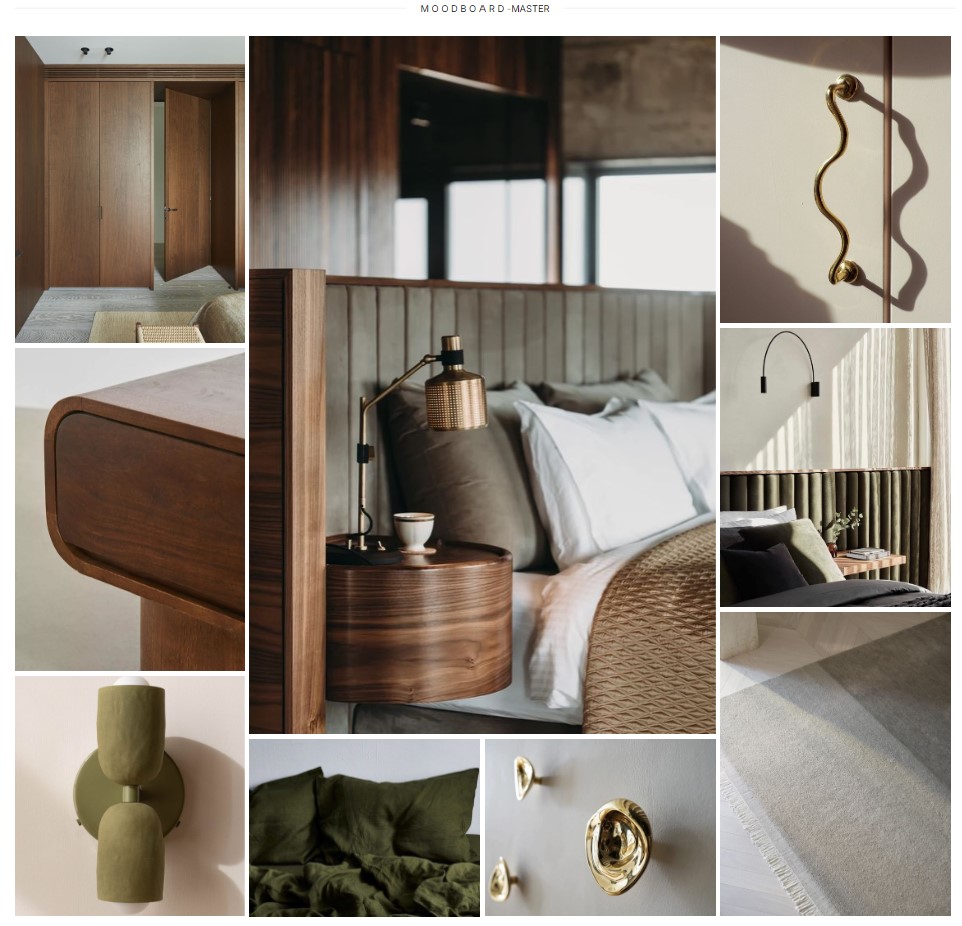
ISCD student Alexandra Neylon explores Japandi style.
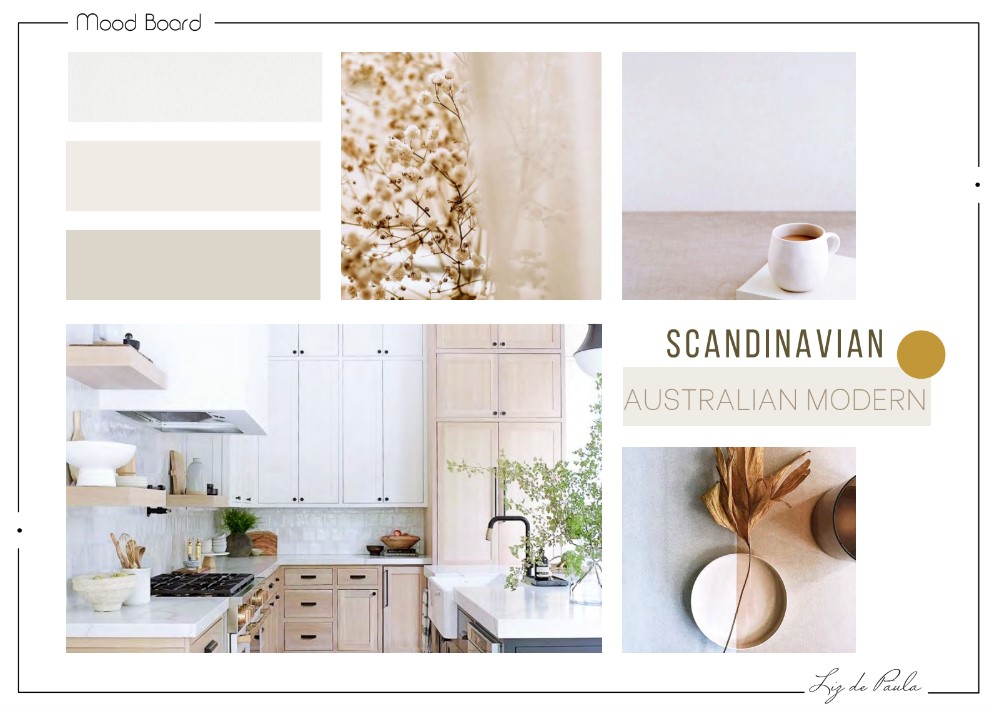
ISCD student Liz de Paula blends multiple styles to create a Scandinavian Australian modern kitchen mood board.
What is a Mood?
A mood is how you want the space to feel and this will lead into your colour palette and textures. Colour has the power to set a scene and to create a mood in any room. It can be a great starting point and can tie all of your elements together.
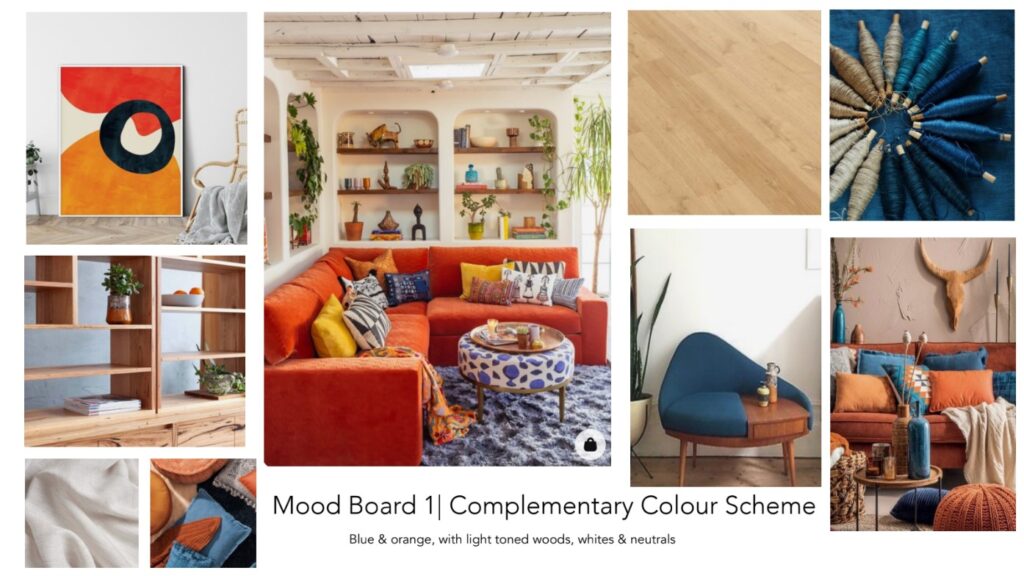
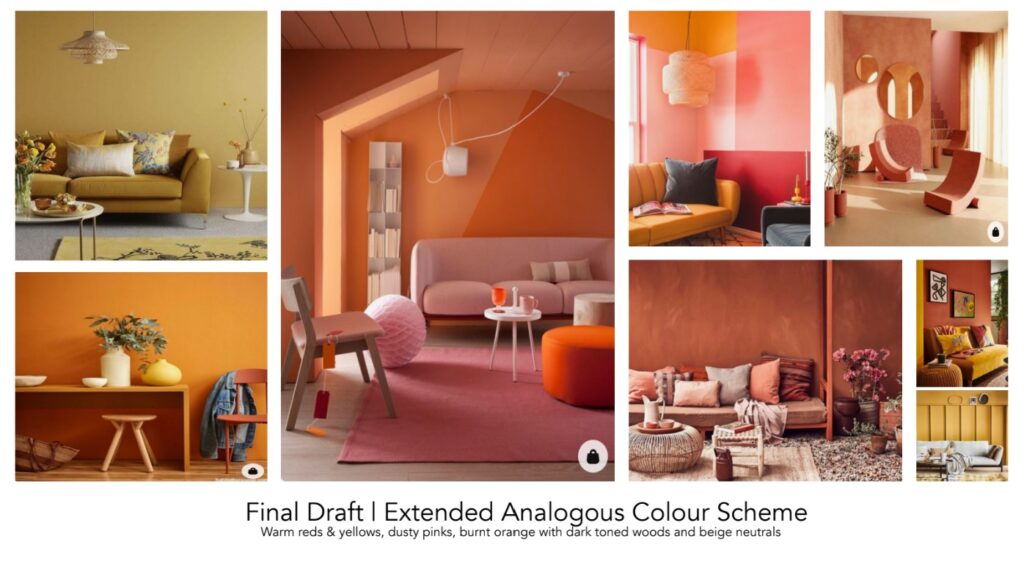
ISCD student Ebony Piper Sawyer uses mood boards to explore a complementary colour scheme and an analogous colour scheme.
Texture can also create various moods in a space. By opting for rough versus smooth textures, variations on textures and textures in the same colour, you can create completely different moods.
When creating your mood board, be sure to consider the style and mood you want to create.
What is a Mood Board?
So what exactly is a mood board? You might notice this term used almost interchangeably with sample boards, materials boards and concept boards, but there are subtle differences.
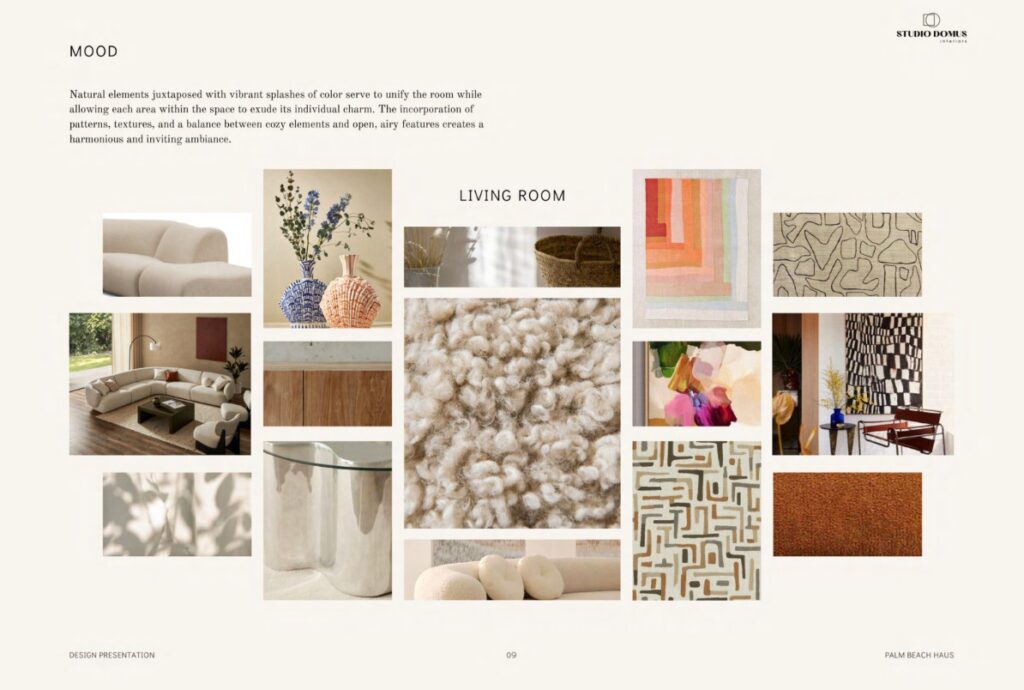
A mood board really is the starting point. Through your mood board, you want to evoke the feeling of your finished space. This means the mood board may or may not include actual products and materials. It could include images of the forest, or coastal scenes. These things won’t actually be part of the house or the room (although they may be represented through artwork, or referenced in furnishings and materials) but each element of your mood board will contribute towards the feeling and the mood that you want that space to represent.
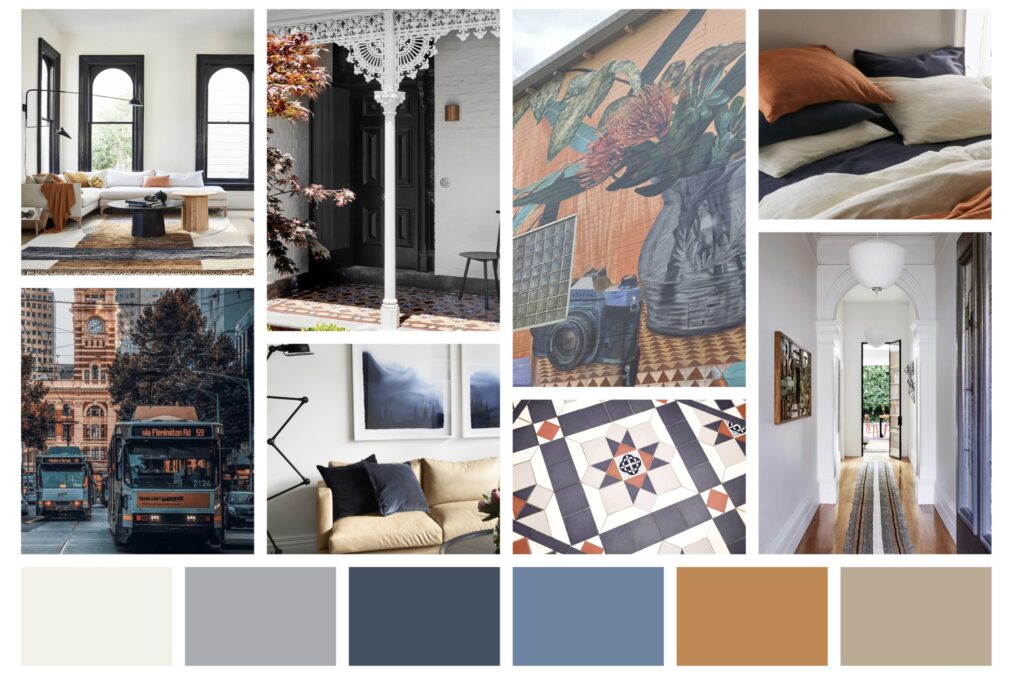
ISCD student Savannah Rooke uses Adobe InDesign to create a mood board and colour scheme for this Victorian terrace home in Subject 1 of the Diploma of Interior Design.
ISCD’s lead educator, Gabrielle Rosenfeld explains mood boards this way.
“A mood board is a collection of ideas or themes that evoke a particular style, mood or feeling. It is not the final presentation to a client but rather an initial means of expressing the overall essence of a scheme. There is no exact science as to what is included in these boards but rather it is what YOU need to convey your initial concept for the scheme.
“Mood boards take a lot of practice and each one you create will be different from the next. You can include some images of existing interiors but be mindful that you don’t want to box yourself into an exact design just yet. The broader the images (think beautiful photography, patterns, colours and general mood images) the stronger the expression of your concept.
“The size of a mood board is usually A3. Mood boards are used as an initial starting point for the design. Once the client has approved it, it can be used as a reference to keep all selections ‘on track’. A good mood board can save a lot of time in the design and sourcing phase of a project.”
Once your client is happy with the mood board, it’s time to move on to concept and materials boards. A concept board has similarities to a mood board, and some of its elements might remain conceptual, conveying a style or a mood, while other elements represent the real products or materials that might be used. In a concept board, this might still be aspirational, with the actual furniture or fittings changing in the final design.
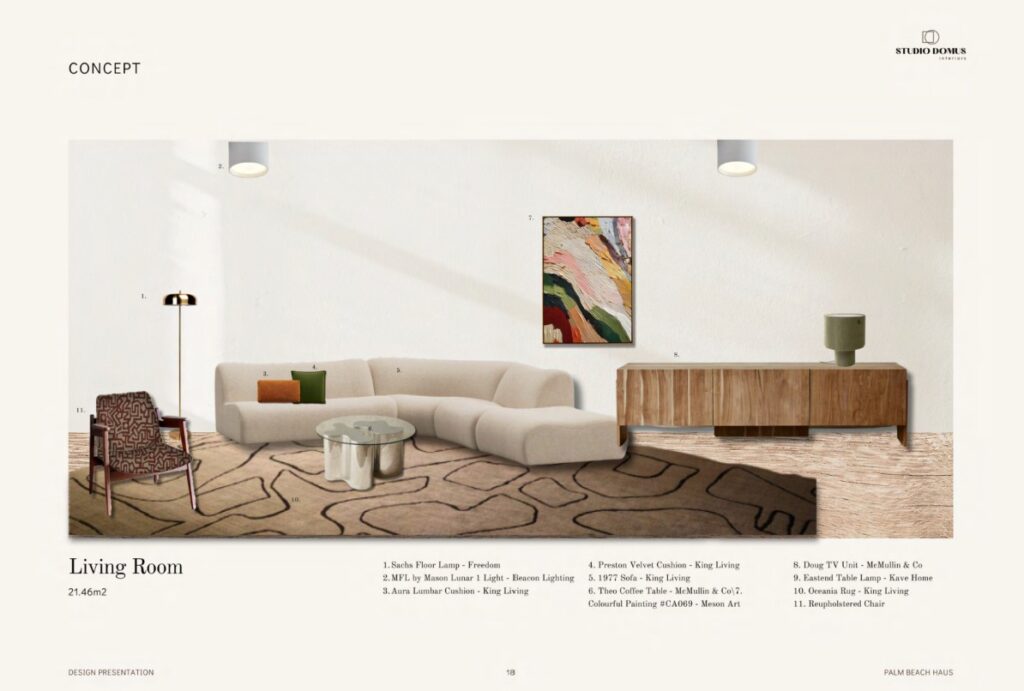
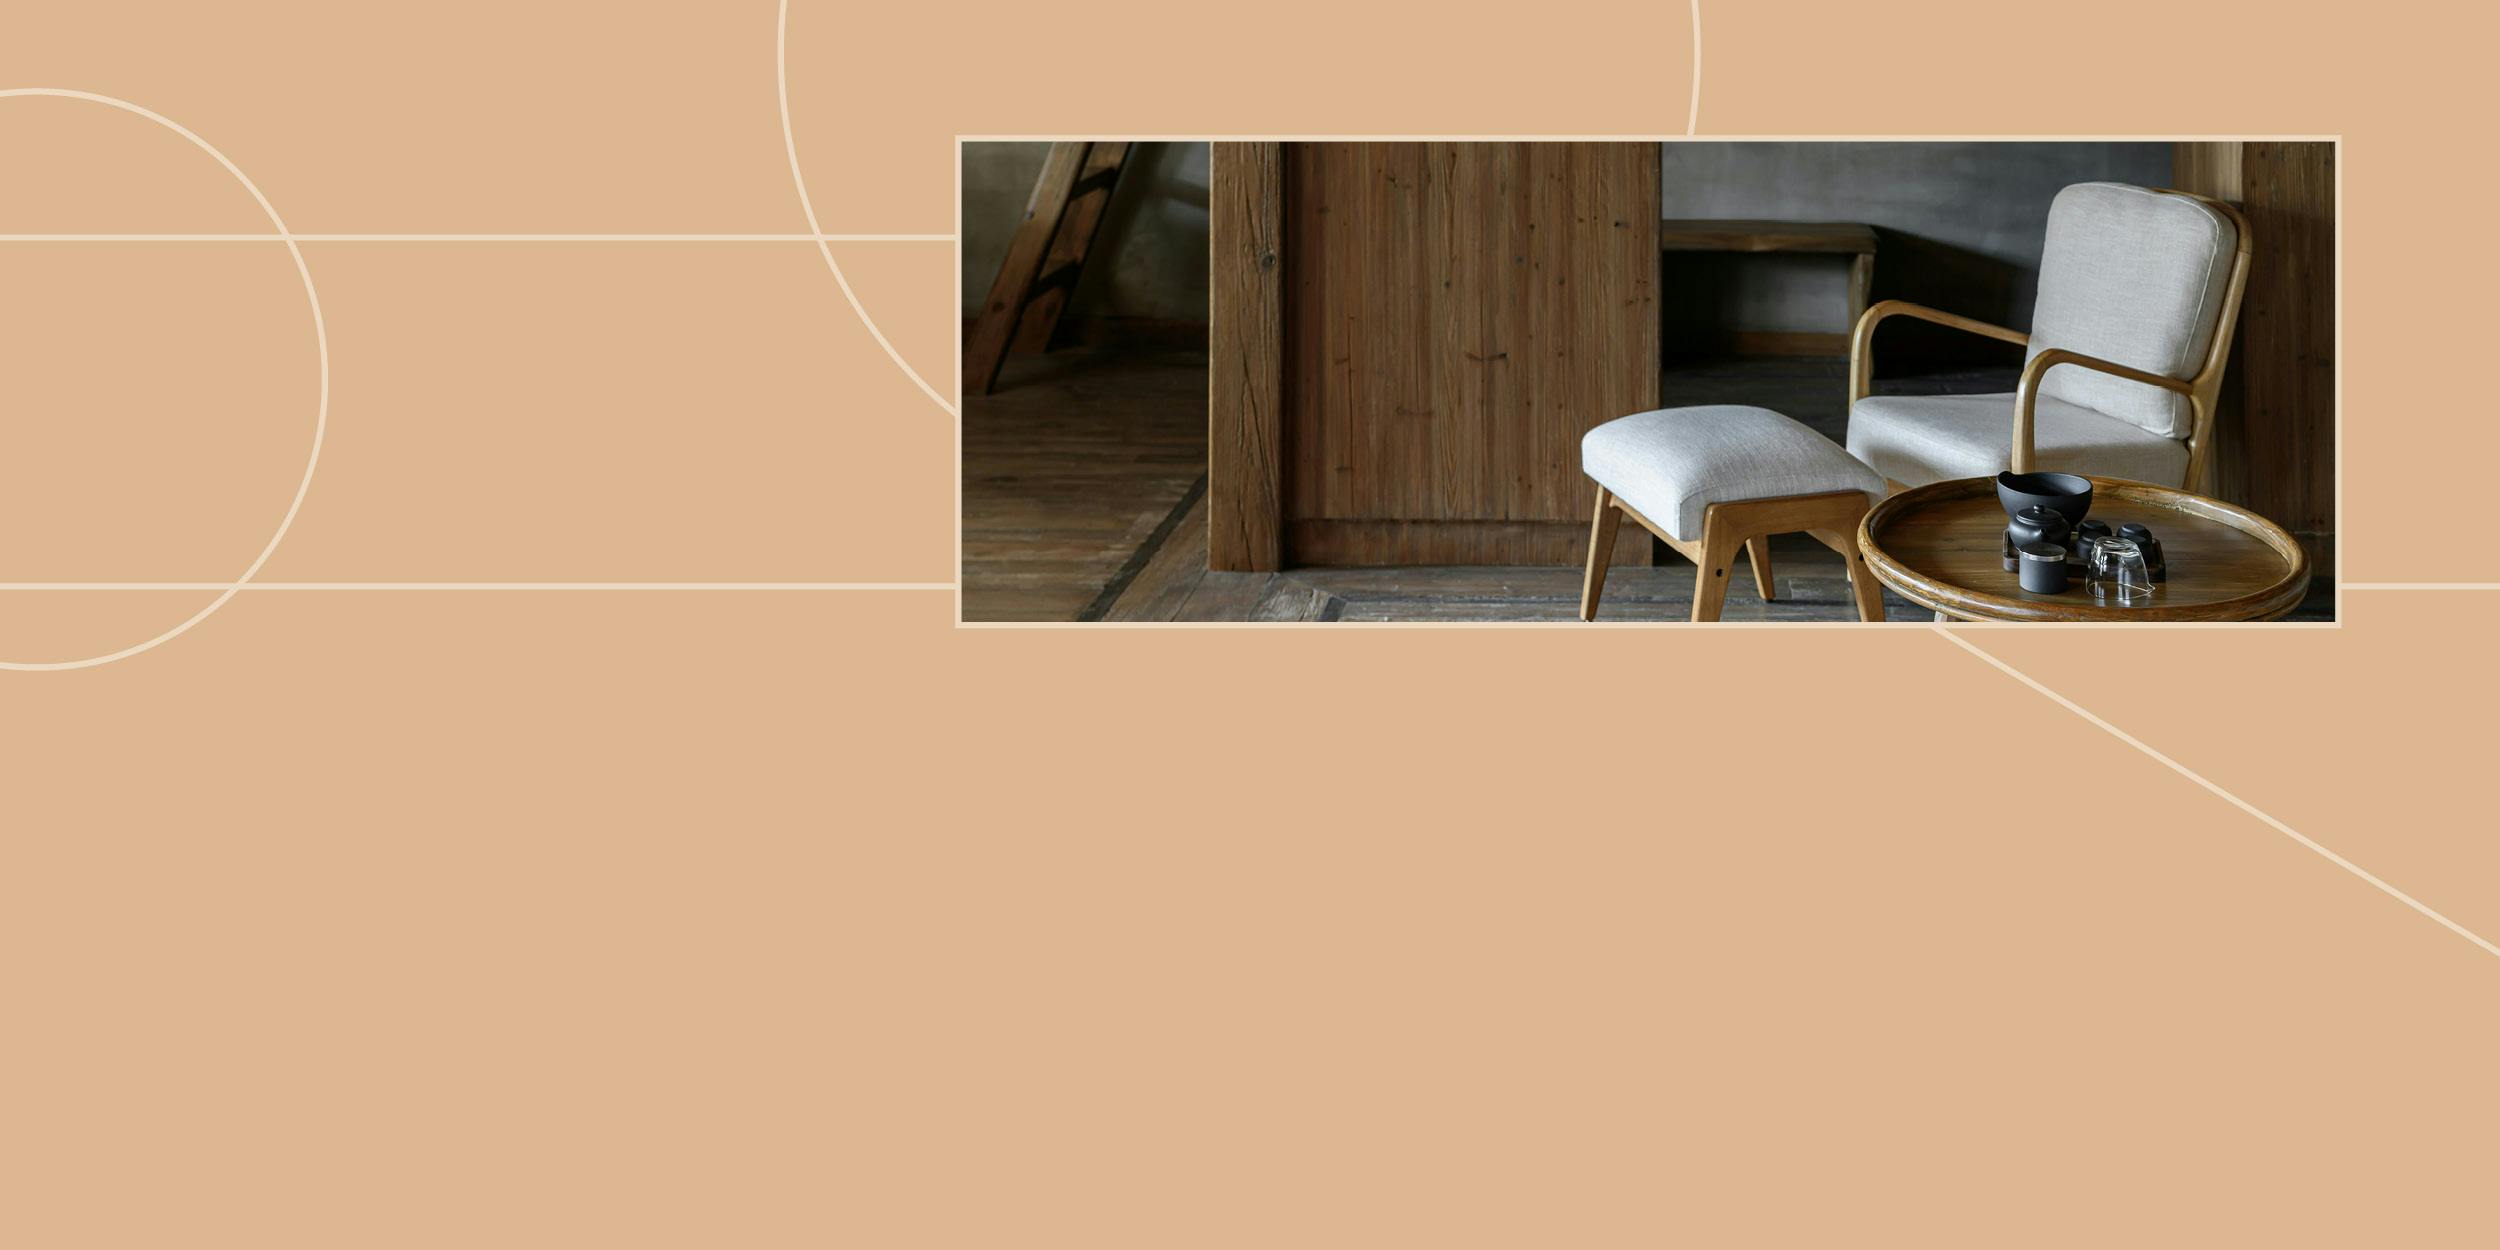
ISCD student Sylvia Hill showcases real products and materials in this concept design.
“A lot of people get confused around mood boards and concept boards and think they are the same thing but the mood board always comes before the concept board,” Gabrielle says.
“A concept board is an extension of a mood board in that it showcases the selections and your design intent for the spaces you are creating. It is a more resolved visual representation to communicate to your client.
“A concept board is the essence of the overall direction you are aiming to provide your client. It should directly correlate with your mood board with selections such as colour palette, hard finishes, soft furnishings, lighting, artwork and accessories etc.”
A colourful, yet sophisticated mood board from ISCD student Sylvia Hill.
A materials board lays out the actual materials to be used. Paint chips, flooring samples, hardware, fabric swatches, tiles and more might all be used to make up your materials board. This is often presented in a flat lay, and unlike the mood board and concept boards, which these days are usually presented digitally, the materials board is more often something physical, allowing clients to get a tactile sense of the materials to be used, and to place materials in their chosen destinations throughout the building, to see how light and other elements will alter their appearance.
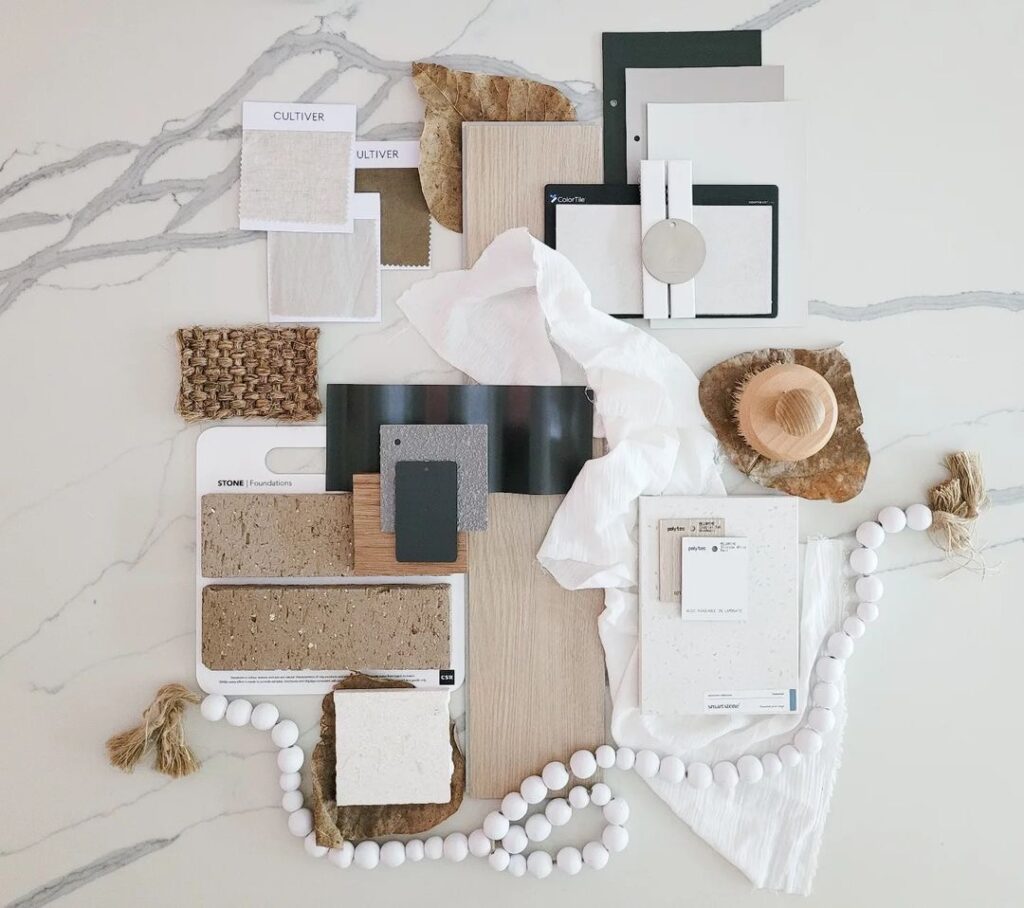
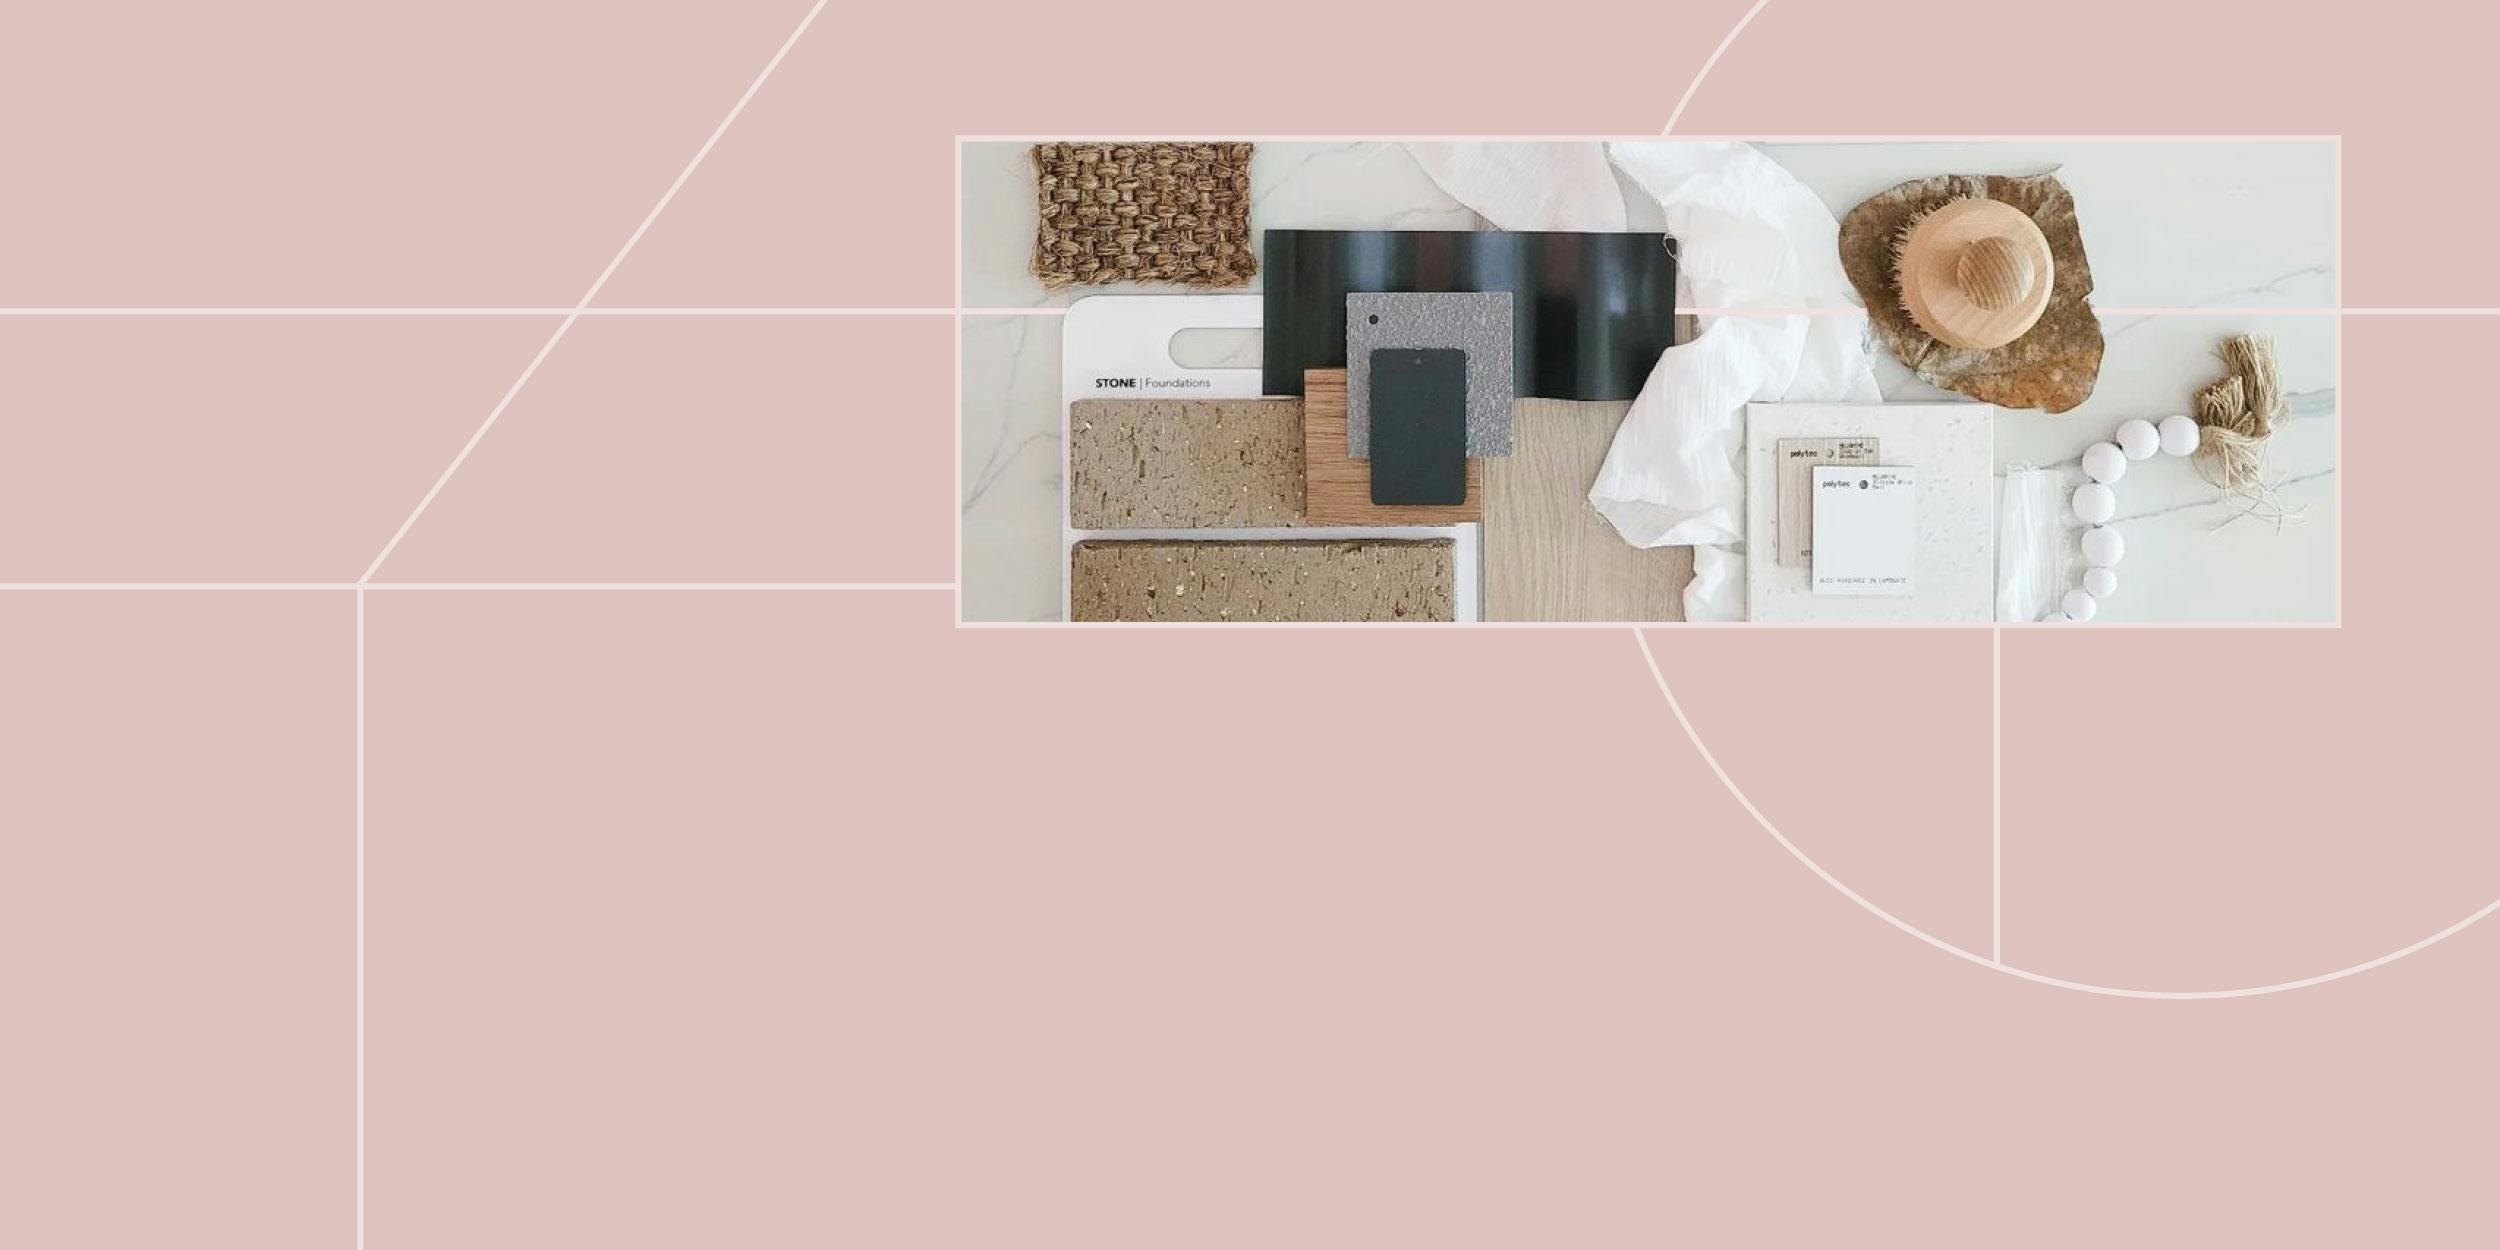
A materials board created by ISCD graduate Lisa Tonkin.
“Once you have gone through your concept design and have worked out the specifications for your project you will have a number of samples that make up your final scheme,” Gabrielle explains. “By presenting them together on a board in proportion to how they are being used, you can give your client a more specific idea of how the resulting space will look and feel. Materials can stand alone on a material board or they can be incorporated across your presentation boards. The sample board is not only important to give the client a visual intention for the project, but it also allows them to feel the quality and texture of the materials.”
What Software Should I Use to Create a Mood Board?
The software you use might depend on your budget, your technical skill or your needs when displaying the finished mood board.
When ISCD students enrol in either the Diploma of Interior Design or the Certificate IV in Interior Decoration, they are given access to software packs that include Adobe InDesign and Programa.
Students use InDesign to create their mood boards, and for concept boards they use InDesign, Canva and Style Sourcebook.
Programa is a comprehensive specification and project management software, and allowing designers to create and share mood boards with clients is just one of its many features.
If you’re looking for something accessible to get started with, then Canva and Style Sourcebook are both free to use.
4 Tips When Creating Your Mood Board
Remember that your board is a collage as much as it is a visual representation of all the things you need to consider when decorating your space. It is a reference for you to use to display the colour, style and mood you’re hoping to achieve.
ISCD student Sylvia Hill used Programa to create this elemental mood board.
Step 1 – Define Your Mood
Find an image that appeals and captures the mood you want to evoke. Continue to collect images that support your vision of the finished space. Some may be representative of the space itself (a kitchen, a hotel lobby, a lounge room) and others might represent the mood, colour palette or even the exterior surroundings.
Step 2 – Define Your Colours
Make sure the colours in the images you use are harmonious. You might choose to include colour swatches as part of the mood board at this stage.
Step 3 – Represent Texture
Even though you might not be presenting actual textures and materials at this stage, it’s important to think about the role texture will play in the final design. Include images that represent the textures of stone, timber or soft furnishings that you plan to incorporate, remembering that these materials will also contribute to the colour palette.
Step 4 – Include Furniture and Accessories
Include images of accessories, furniture, fabrics, art etc., that will complement your colour scheme and represent the chosen mood and style. These may not be the exact products that you will present to your client, but they should be representative of the finished look, helping your client to envision how the space will look.
Another Programa mood board, created by ISCD student Elinore English.
Once you have all the elements, spend some time getting the layout right. Grid layouts are traditional, but even within a grid layout there is plenty of room for creativity. Think about the white space you will use between and around your images to give each image the room it needs to shine. This might mean rethinking, and even removing some of your selections. Make sure that you emphasise the right hero elements when it comes to size and positioning, drawing the eye to what is most important.
This post was originally published on 3 April 2016, and updated on 28 March 2024.
ISCD has a 40-year proven track record of producing leading Australian interior designers. We know design intimately, from colour theory, to furniture selection to the latest industry trends.
Are you interested in studying interior design or decoration? Do you want to know more about our online courses and where a career in interior design could take you? Connect with us today to learn more about our Diploma of Interior Design, the Certificate IV in Interior Decoration or any of our industry-focused microcredentials.